Table Etiquette 101: The Place Setting
03.14.24
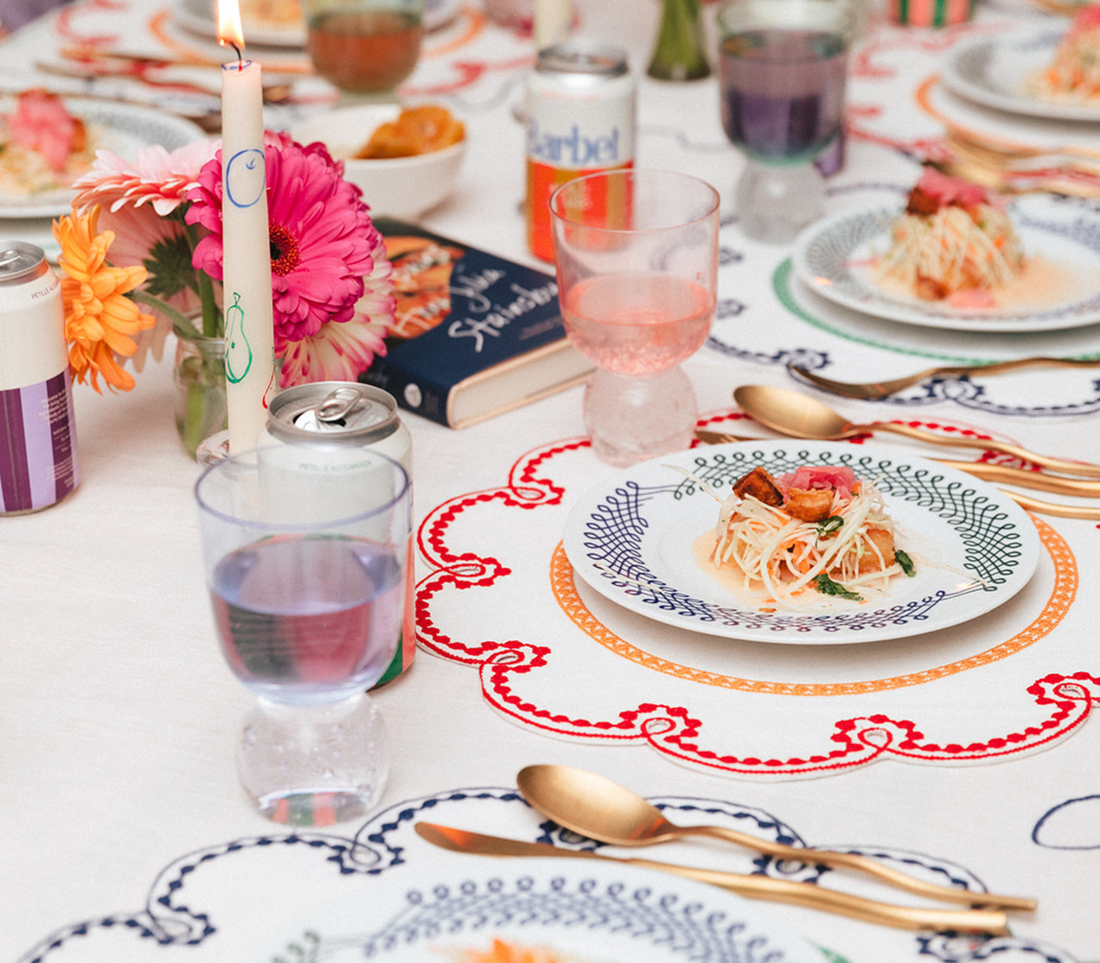
Vai Yu (@rawkavai) for Yui and Mei using Misette "The Fête Collection."
__________________________________________________________________________
Even a regular Tuesday dinner can turn into an annual. Sharing a meal with your loved ones feeds not just the stomach but also the soul. But, ever find yourself in a fancy face-off between soup spoons and dessert spoons, debating the placement of white wine glasses next to red ones or the eternal struggle of arranging drinkware—left or right of the water glass? You are not alone. The etiquette maze can leave us scratching our heads but fear not. We have broken it down so you have little table navigation stars that will even make Emily Post proud.
First and Foremost
When throwing a party, remember the essential ingredients:
- Gather your favourite humans (and animals! While not known to be the best conversationalists, they can be great conversation starters and are always happy to be on clean up crew).
- Dive into deep chats.
- Dish out a feast to remember.
Setting the table means everyone gets a fair share of cutlery, plates, and glasses, all in a specific order. In medieval times, guests had to use their trusty knives since forks weren't a thing yet. But then Italy dropped the fork bomb in the 11th century, sparking a cutlery revolution that traveled to France, courtesy of Catherine de Medici.
As a rule of thumb, stick to the essentials when setting the table. There is no need for an overload of settings —keep it simple to avoid baffling your guests.
However, opting for simplicity doesn't imply that you can't add a touch of personality to your table. Add colour, texture, and personality with linens, placemats, glassware, and flowers; you name it. Mismatched plates? They have a story behind them. Napkins that don't match? No one will leave saying, "Great party, but the napkins didn't match." Perfect is not what we are striving for here.
Let's break it down...
We weren't kidding when we said we were simplifying and breaking this down..
Step 1: Linens
Use a runner instead of a tablecloth. A little less intimidating, a little less expensive than a tablecloth, and a little less laundry the next day. The beauty of runners is that anything goes. Cheesecloth, a strip of fabric from your local store, or whatever can run across a table can work. Just ensure it doesn't come with an overpowering scent or live insects.
Misette's grid embroidered linens are giving us Love Bite vibes that we love right now.

Misette Grid Embroidered Linen Napkins.
 Bianka Gill for Hidden Taste 001.
When it comes to placemats, keep the imperfection theme going. You can go the matching route or use one you hauled home from your early 20s travel days, the one your mom regifted you back, the few you inherited from a great aunt you never met, or the 12 sets you bought as a functioning adult. Anything goes and use what is around you.
Step 2: The Set-Up.
Architectural Digest tells you to "set dinner plates in the center of the placemats." You don't say. We don't break it down that far, but all you really need to know is:
-
The dinner plate goes in the center of the place setting.
-
The fork goes to the left of the plate.
-
If salad is on the menu, give the salad fork the VIP spot on the left of the dinner fork. No salad? Slide that fork to the right for dessert duty.
-
The knife and spoon (aka beverage spoon) go to the right of the plate. The knife is placed to the right of the plate with the sharp edge toward the plate (safety first!). To the right of the knife is the spoon.
-
A water glass goes above the knife.
-
If soup is on the menu, the bowl goes on the plate and a soup spoon to the right of the beverage spoon.
-
Salad or bread and butter plates go to the left of the fork(s).
-
A cup and saucer go above the spoons with the handle angled to the right.
-
Wine and Barbet cans are positioned to the left of the coffee cup.
We even have a handy downloadable guide here.
Step 3: The Humble Napkin.
The napkin deserves it's own step. The history of the napkin, spanning centuries, has evolved from a simple tool to a decorative accessory.
Although it may seem protocol, Martha Stewart advises against setting a napkin underneath the forks, and she is trustworthy when it comes to this kind of thing, and paper napkins have been a no-go for quite a long time.
For folding techniques, they are all over TikTok.
 Vai Yu (@rawkavai) for Yu & Mei using Misette "The Fête Collection."
Step 3: Party's almost over...
Now it's dessert time, which means you can breathe a sigh of relief because everything went according to plan, nothing is on fire, and the meal is edible. Let's assume all guests are still standing, politics didn't make it past the first course, everyone is happily sipping a Barbet, and your two single friends, whom you invited solely to set them up, have a date planned. Success.

Vai Yu (@rawkavai) for Yu & Mei using Misette "The Ribbon Collection"
Stay tuned next month when we tackle "The Dinner Party Clean Up." It sounds boring, but what better party hack than one that has your space back to its formal glory in less time than it took you to make the salad? No one likes waking up to dirty dishes in the sink.
__________________________________________________________________________

